The starting point for this project was straightforward: replace an old bathtub with a spacious walk-in shower. What made it interesting was the approach — using the job’s own constraints to improve the layout rather than fighting them. Plumbing lines became a built-in shelf. An ugly structural bump became two tiled niches. That’s what designing with constraints looks like in practice. Before starting any bathroom remodel, check out the key points to review before requesting a bathroom renovation quote to avoid the costs that most estimates miss.
By Clara AJMAR, interior architect & landscape designer DPLG – May 2026
A job constraint, well integrated, becomes a design asset. That’s what bathroom renovation is really about.
1. Before the remodel: what the bathroom looked like
2. Demo day: what you find inside a 2000s apartment wall
3. Running the pipes: technical shelf, niches and dropped ceiling
4. The full apartment layout
5. Tile, mosaic and vanity: the finishing choices
Clara and Mathieu walk through every step of this bathroom transformation in the video below.
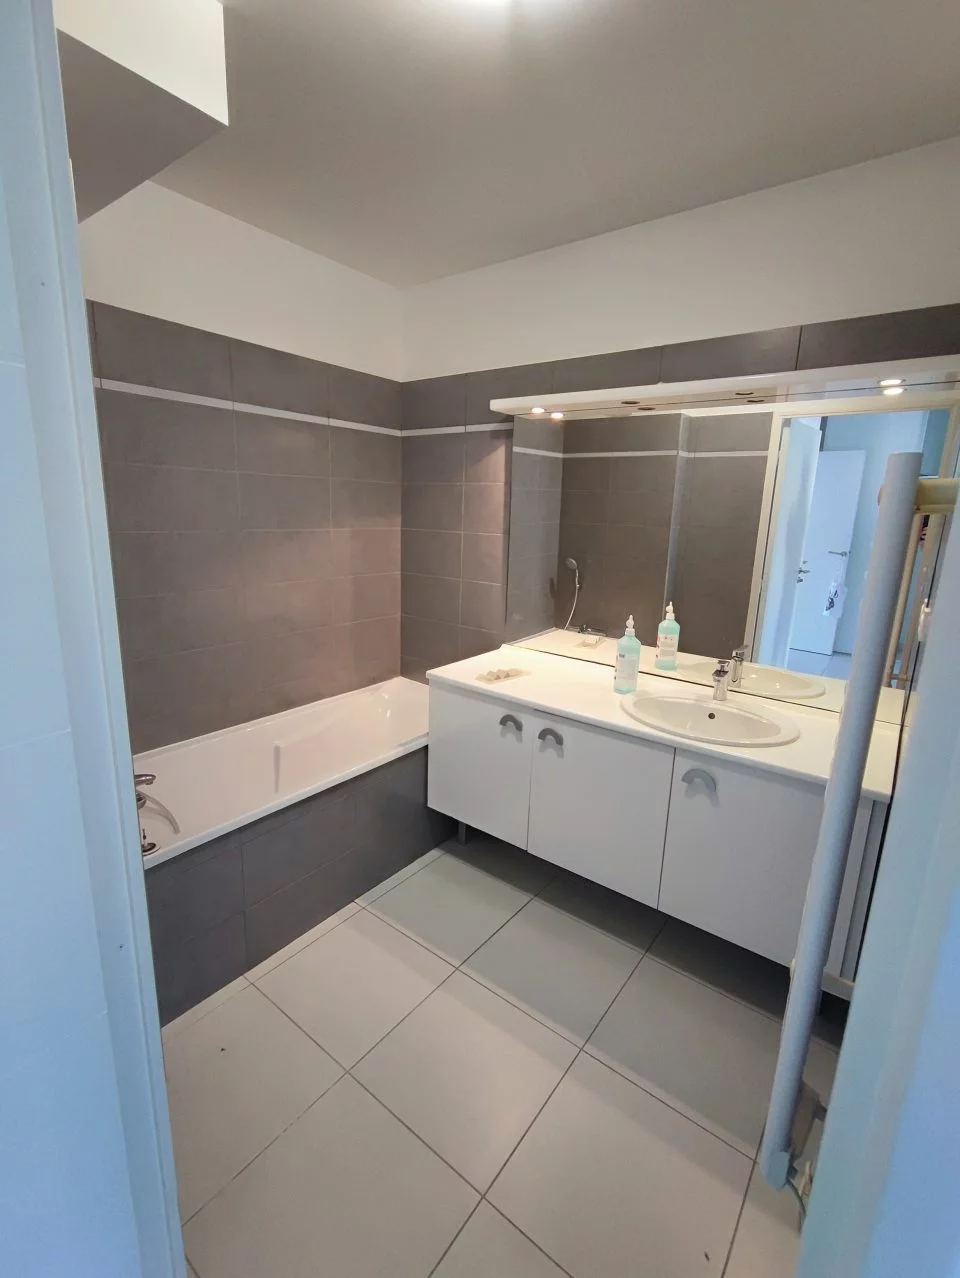
Before the remodel: what the bathroom looked like
This bathroom was part of a 925 sq ft (86 m²) apartment in a building from the early 2000s. The original layout centered around a bathtub the owner no longer used — they wanted a roomy walk-in shower instead. The goal was clear. Getting there was more involved than expected, as it usually is once demo starts.
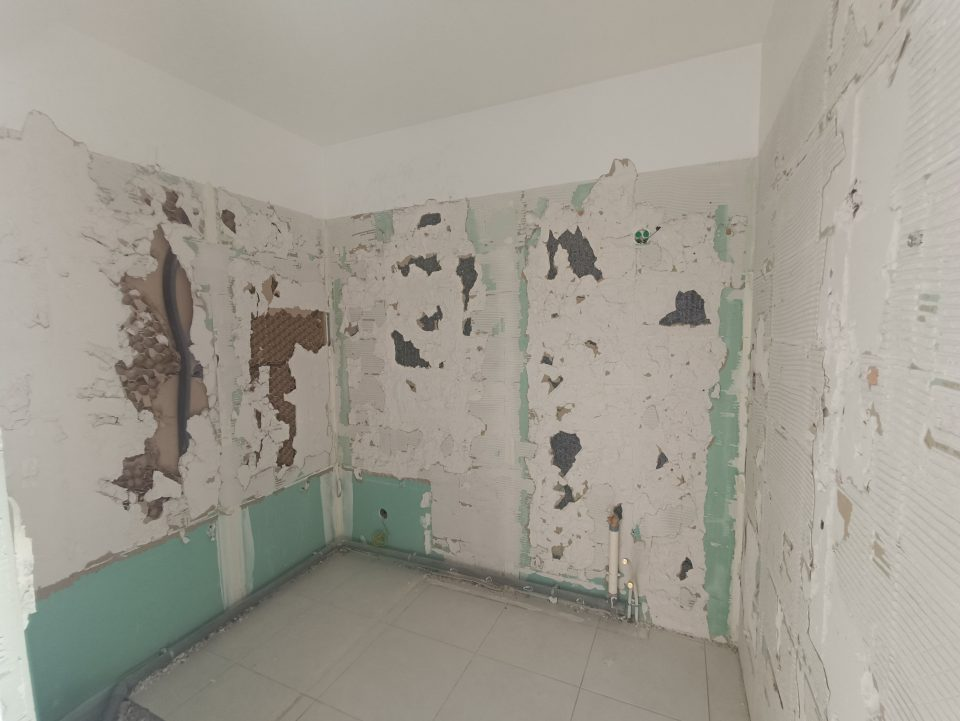
Demo day: what you find inside a 2000s apartment wall
Once we started pulling tile, the first real challenge appeared: hollow-core partition walls. These are common in apartments built between the early 1990s and the 2010s — they look solid but they’re not. Removing tile or cutting into them without the right technique can cause them to crumble or lose structural integrity.
We rebuilt the bathroom walls and also took the opportunity to address the shared wall with the kitchen — there were concerns about long-term stability and the ability to support upper cabinets on that side. This is a cost many homeowners don’t plan for: structural surprises discovered mid-demo can add $600 to $1,800 to a bathroom remodel budget, depending on the extent of the work.
In apartments built between 1990 and 2010, hollow-core partition walls are extremely common. Always ask your contractor to assess the condition of existing walls before finalizing the quote. Structural repairs discovered after demo typically run $600 to $1,800 and are rarely included in initial estimates.
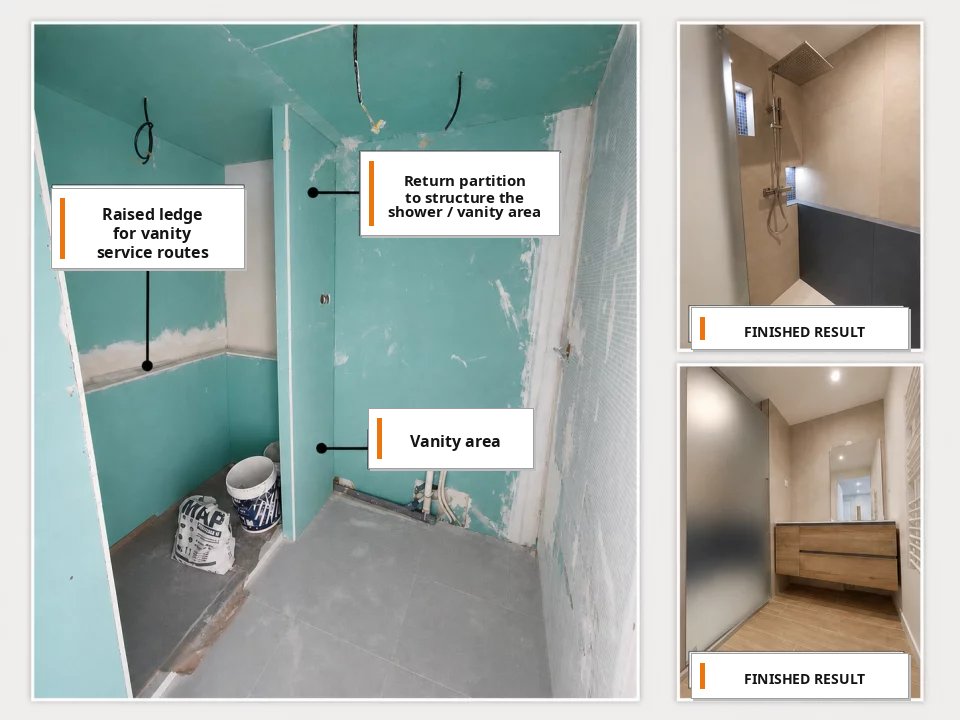
Running the pipes: technical shelf, built-in niches and dropped ceiling
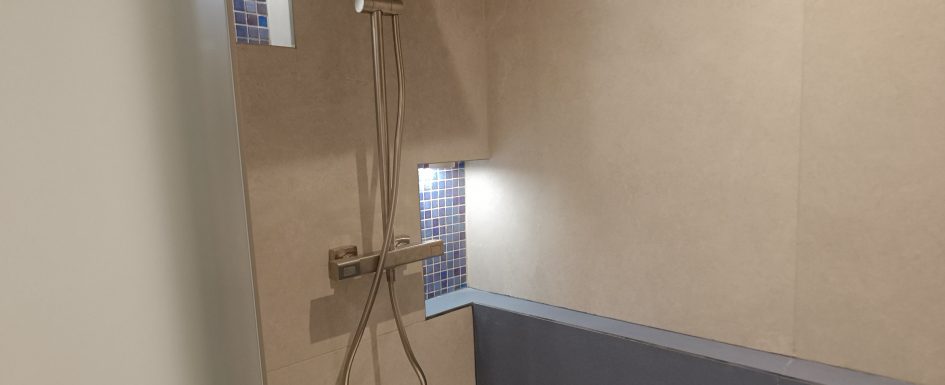
After demo, we built a system of technical enclosures around the shower to route the supply lines and drain without exposing them. Instead of hiding everything inside the walls, we routed them into a built-in shelf at 35 inches (about 90 cm) from the floor. That shelf serves double duty: it conceals the plumbing and gives you a practical surface inside the shower — a place to set shampoo, soap, a razor — without any added hardware.
From there, we framed moisture-resistant drywall enclosures and installed a dropped ceiling to route the electrical runs cleanly for the recessed lights. In bathroom renovation, these framing elements — enclosures, chases, dropped ceilings — aren’t just about hiding problems. When they’re designed intentionally, they become part of the project.
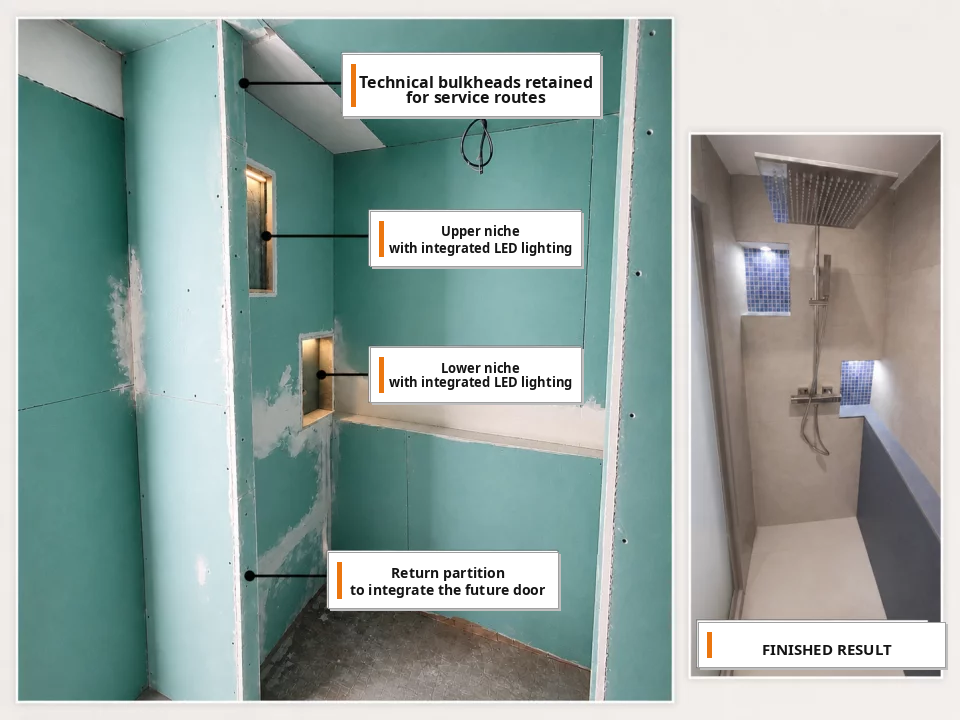
The shower wall had another constraint: a structural bump caused by the building’s shared drain stack and the upstairs unit’s waste line — built in at original construction and not legally modifiable in this condo. Rather than casing it in and losing space, we aligned the enclosure with that bump and built two tiled recessed niches into it, routing the ventilation inside the same cavity. A structural non-negotiable turned into a functional feature.
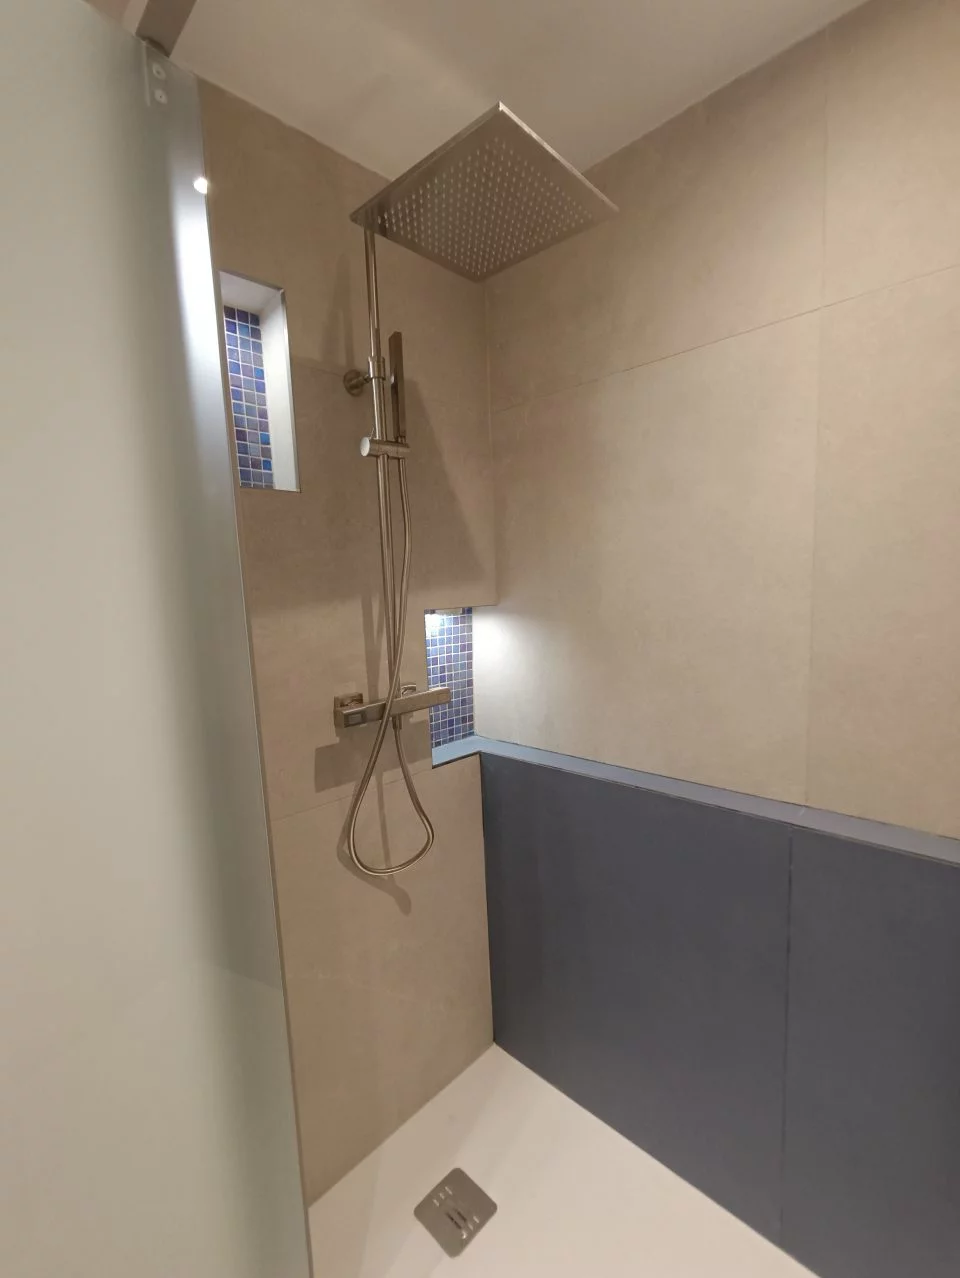
On this project, the drain stack and the upstairs waste line were untouchable — condo association rules, period. Instead of awkwardly boxing them in, we built against the bump and created two iridescent mosaic niches out of it. The result is cleaner and more functional than any cover plate would have been. That’s always the right move when a constraint is non-negotiable: work with it, not around it.
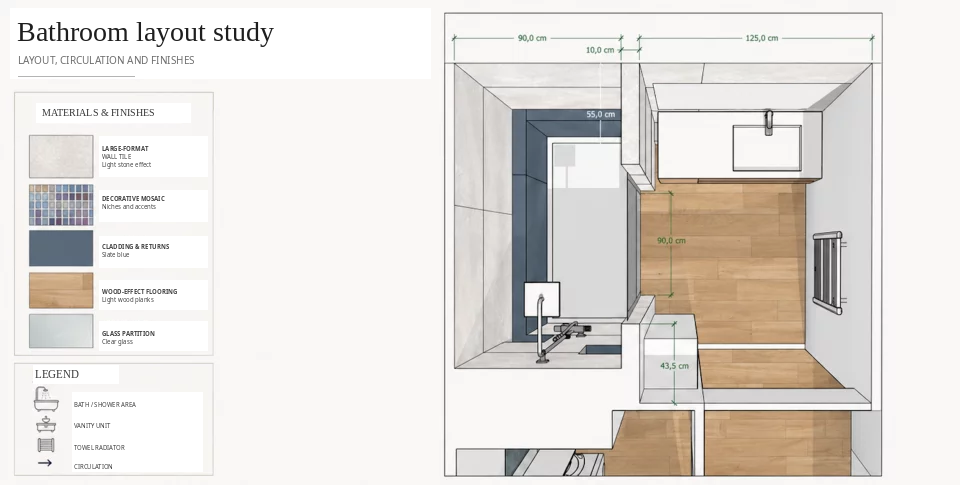
The full apartment layout
This bathroom remodel was part of a larger renovation of a 925 sq ft (86 m²) apartment. To see how the bathroom decisions connect to the reconfiguration of the entry, kitchen and living area, check out the full walkthrough in the video dedicated to the layout of this 86 m² apartment: connecting the entry, the open kitchen and the living room.
Tile, iridescent mosaic and vanity: the finishing choices
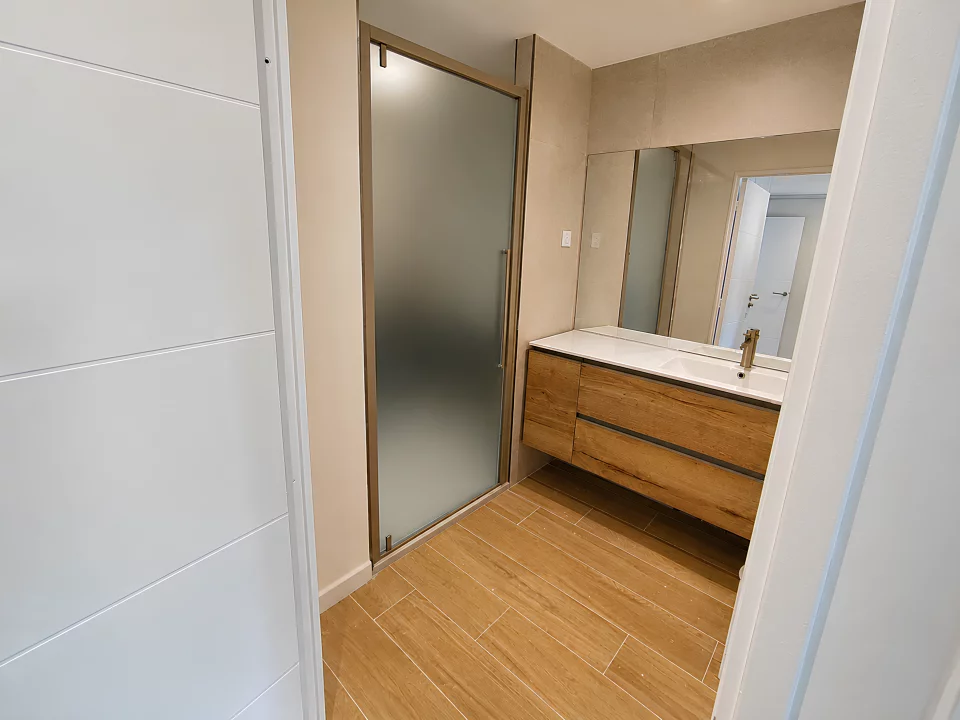
Once the structure was in place, we moved on to finishes. The owner chose a wood-look tile for the floor to warm up the space, paired with a stone-tone wall tile and a deep blue accent. Inside the shower niches, the tile shifts to an iridescent mosaic — it catches the light, adds depth, and gives the bathroom a custom look without overcomplicating the palette.
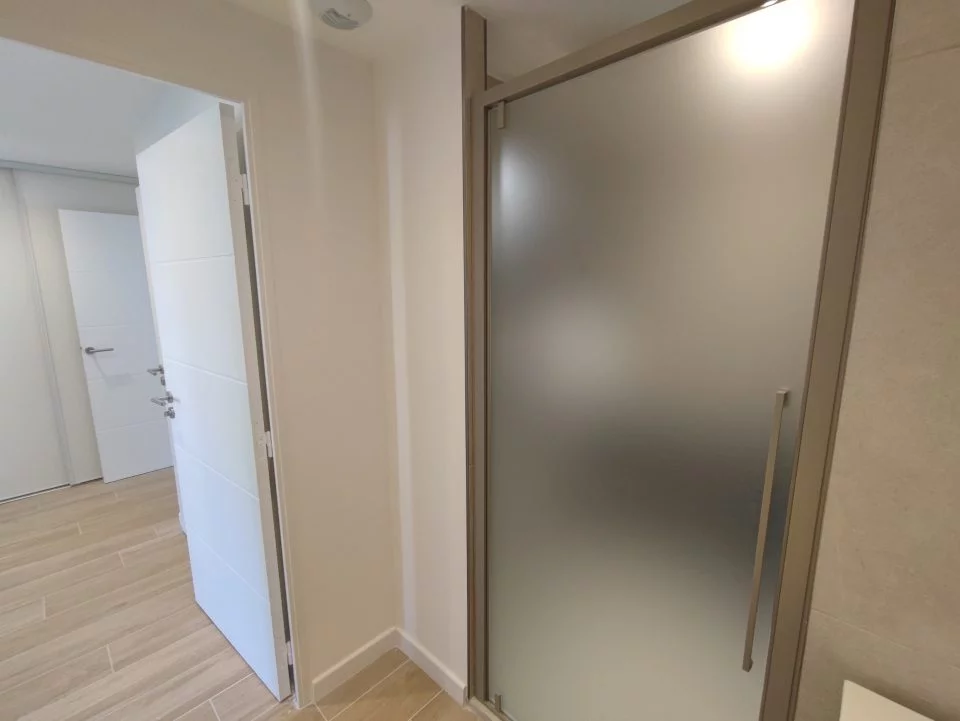
The wood-effect vanity was installed with a deliberate gap on each side — easier installation, and simpler maintenance access down the road. Below the sink, a removable access panel was framed around the supply and drain connections: clean finish on the outside, full access when needed. A small moisture-resistant curb was added at the shower entry to stop water tracking across the floor once the shower door was hung.
On lighting: every recessed fixture in a bathroom must be rated for wet or damp locations. This is a safety requirement, not a style choice. A standard light fixture in a shower zone is an electrical hazard — and a liability issue in a sold or rented property. Always verify the IP rating before install.
The end result reflects the original intent: we didn’t just swap a tub for a shower. Every constraint on the job became part of the design. The plumbing became a shelf. The structural bump became the niches. A dated bathroom became a modern, comfortable space that fits how the owner actually lives. See all our renovation projects on the ArchiWorking YouTube channel.
Clara AJMAR

How much does it cost to convert a bathtub to a walk-in shower?
Costs vary based on existing conditions, bathroom size and finish level. A full bathroom remodel with walk-in shower, new tile and vanity typically runs between $5,000 and $15,000 for a comparable project. On this build, the budget included hollow-core wall repairs, framing the technical enclosures, dropped ceiling, tile throughout and the vanity. The biggest wildcard is what demo reveals: structural repairs discovered after tile removal can add $600 to $2,500 that weren’t in the original quote.
Can you modify a shared drain stack in a condo bathroom?
In most cases, no. Shared drain stacks and waste lines installed at original construction are part of the building’s common elements — condo association property, not yours to modify. What you can control is the framing around them. On this project, we built against the bump rather than trying to eliminate it, and turned it into two tiled niches. That’s the right approach when a constraint is legally non-negotiable: design with it.
What type of recessed lights should I use in a bathroom remodel?
You need fixtures rated for wet or damp locations, with an appropriate IP (Ingress Protection) rating for the zone they’re installed in. This is a code requirement in most jurisdictions — and a basic safety issue. A standard recessed light in a shower or above a tub is a hazard. Always verify the rating with your electrician before rough-in.
How do you run plumbing lines in a walk-in shower without exposed pipes?
By building a technical enclosure — a framed, tiled bulkhead — that routes supply lines and the drain around the perimeter of the shower. On this project, the enclosure became a built-in shelf at 35 in. (about 90 cm) off the floor: functional storage and clean pipe concealment in one element. It’s the most practical solution when the drain stack or existing rough-in prevents a fully flushed layout.