
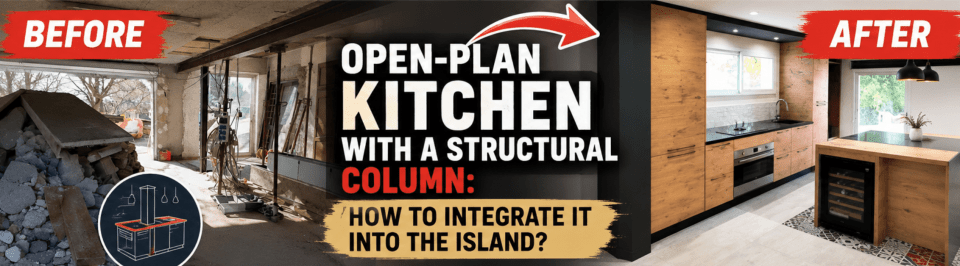
At ArchiWorking, we love turning constraints into ideas. In this project, an open-plan kitchen featuring a central structural column became a masterclass in balance and ingenuity. From opening the load-bearing wall to integrating the column into the island, each step shows how structure can drive design.
By Mathieu REY, Architecture and Space Planning Specialist (updated July 2026)
A structural constraint embraced from the first sketch becomes an architectural signature. That is designing with the build in mind.
1. Opening the load-bearing wall to free light and space in an open-plan kitchen
2. Reframing the column: from structural constraint to focal point of the layout
3. The design takes shape: plans, moodboards and cement tile flooring
4. Installing the kitchen: an I-shaped layout with a central island around the column
5. The finished space: an open kitchen with the column integrated into the island
Key takeaways
Frequently asked questions
Mathieu comments on each step of this transformation project in this video.
Step 1 – Opening the load-bearing wall to free light and space in an open-plan kitchen
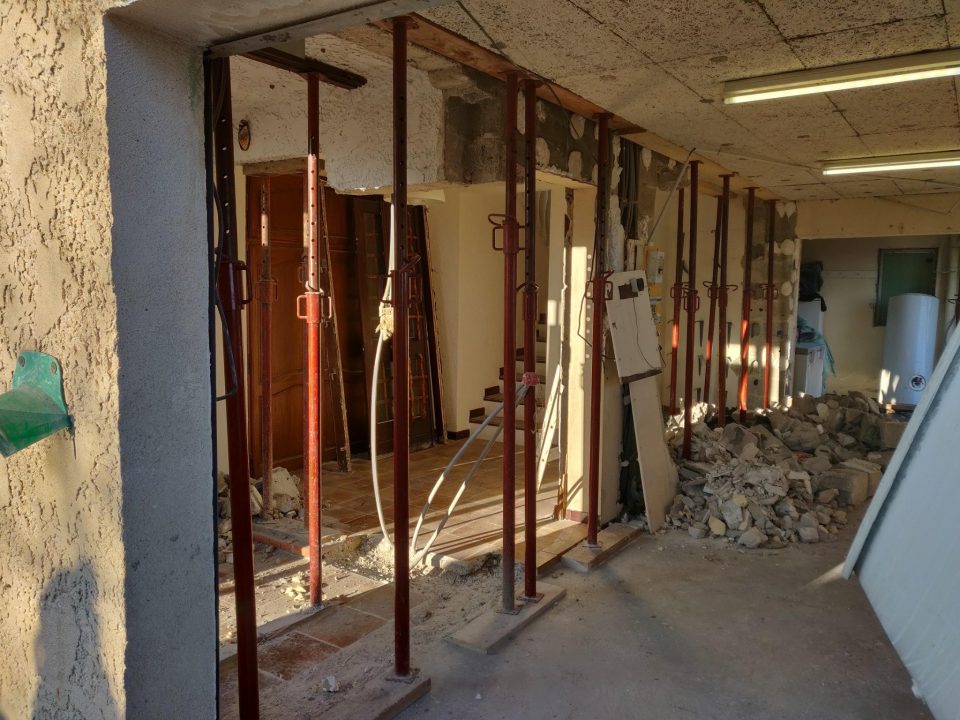
The process started by removing a load-bearing wall to connect two rooms and create a generous day area. The program merges several spaces, the entrance, the hallway, the staircase and even part of the garage, into one large open living room with kitchen and dining area. Temporary steel props supported the floor while the masonry was taken down. A steel IPN beam and a central column now carry the loads, setting the tone for the new, brighter volume, in line with the structural engineer’s calculations. For more on this topic, see our article about the kitchen island as a bridge between living room and kitchen.
On this type of intervention, opening a load-bearing wall represents on average between €5,000 and €8,000 (roughly $5,500 to $8,700) depending on the configuration. Let’s be very precise about that figure: the price truly depends on the type of load transfer, the reinforcement and the underpinning to be carried out, and can be lower as well as significantly higher. Having a specialist price your exact configuration is essential. This cost is also inseparable from the other structural work items, floor, adjoining walls, linings and the complete refit of the kitchen: the whole must be priced and coordinated from the design stage.
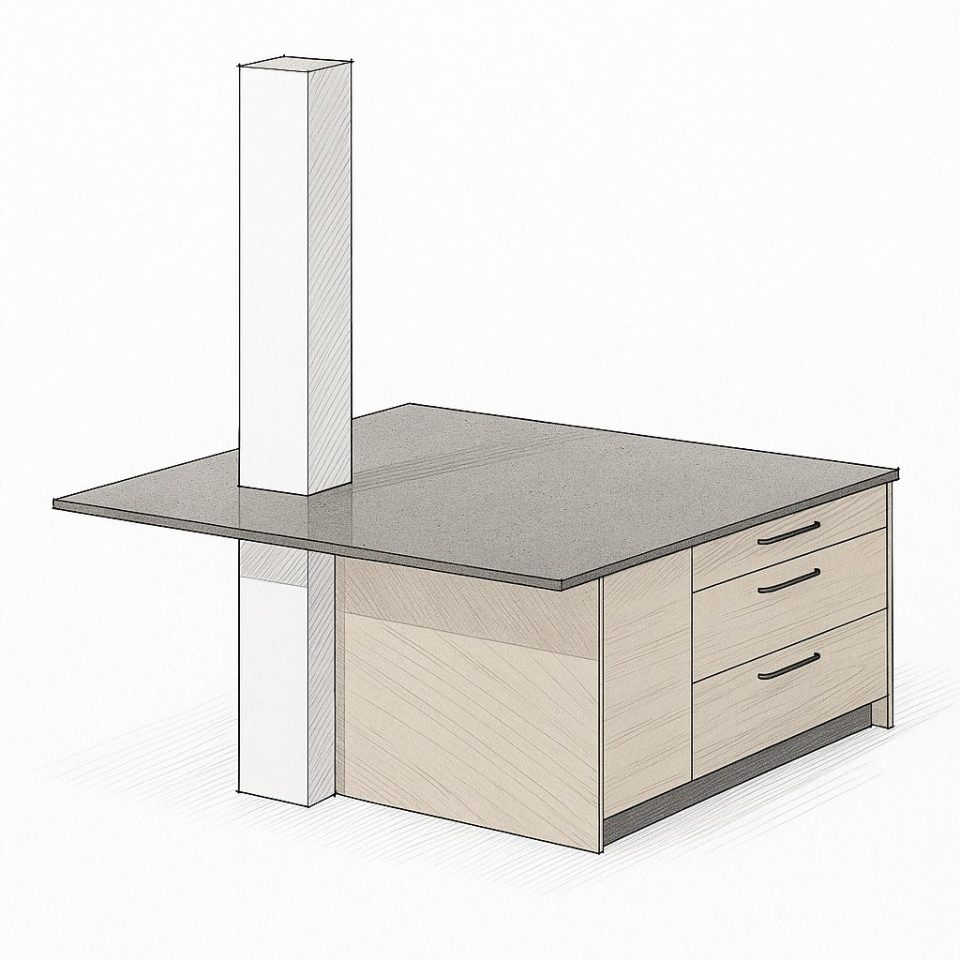
On this project, the central column was not a design option: the structure itself required it to carry the loads of the IPN beam. The right question is never “how do we get rid of it” but “how do we integrate it coherently from the first sketch”. Asking that question early is what turned it into an asset.
Step 2 – Reframing the column: from structural constraint to focal point of the layout
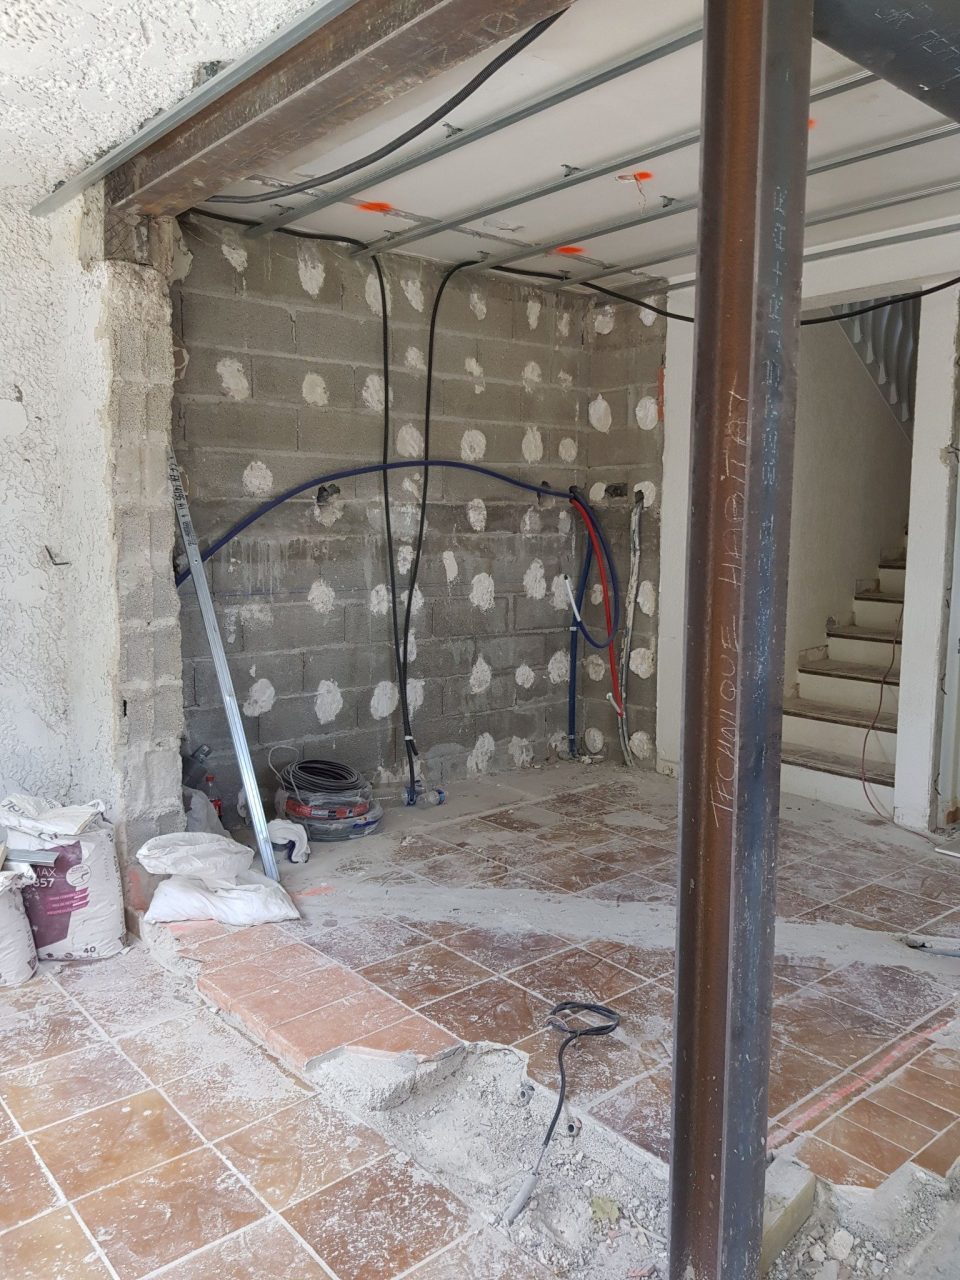
At first glance, the column breaks the line of sight. That’s precisely where creativity starts. Instead of hiding it, the decision was to integrate it into the future island, turning it into a reference point rather than an obstacle. Two treatment options were presented to the owner: a column boxed in plasterboard with finishes matching the cabinetry, or the steel post left raw and simply varnished, in a more industrial spirit. The exchanges steered the choice towards the raw industrial look, with one finishing detail to settle with the stone fabricator for the worktop corner around the column. For more kitchen planning insights, explore our specialist advice.
Step 3 – The design takes shape: plans, moodboards and cement tile flooring
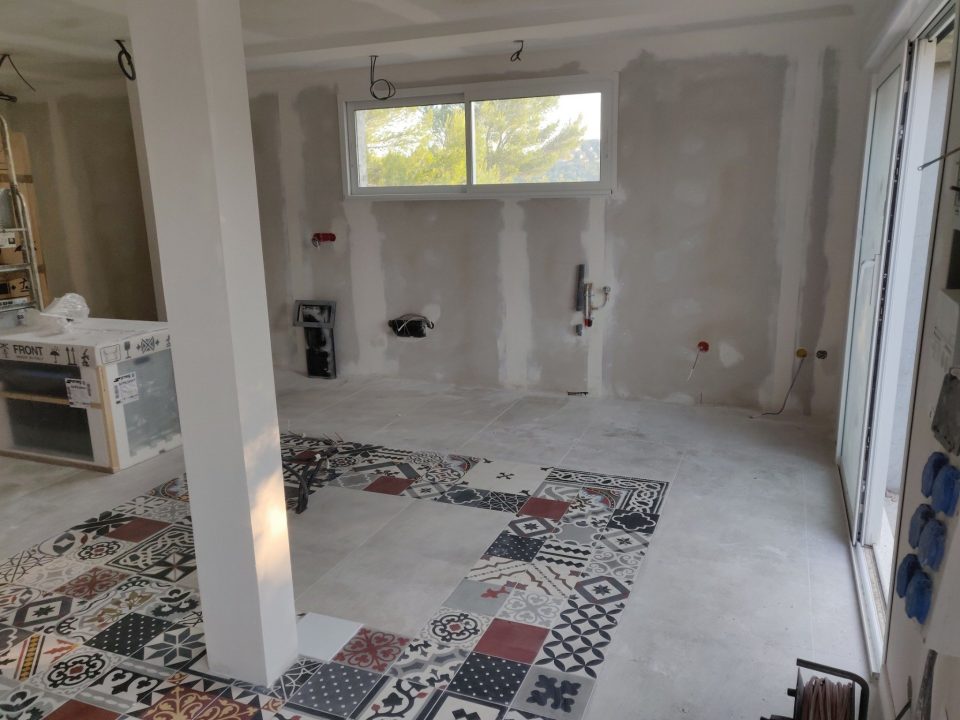
During the design phase, the elevation and section were finalized in the architecture software, and two moodboards were built from the inspirations sent by the client: one with graphic cement tiles, the other more colorful. The selected palette combines honey oak, matte black, matte white and genuine cement tiles laid as a rug around the island, with a 3D projection helping the owner grasp the volumes and the tile layout. Works then progressed with electrics, plumbing and plastering. The column was boxed in and aligned with the new ceiling. On the floor, graphic cement tiles quietly define the kitchen area and add rhythm. The final intent is already visible: a bright, coherent open space structured by the central column. Learn more about the timeless appeal of cement tiles.
Step 4 – Installing the kitchen: an I-shaped layout with a central island around the column
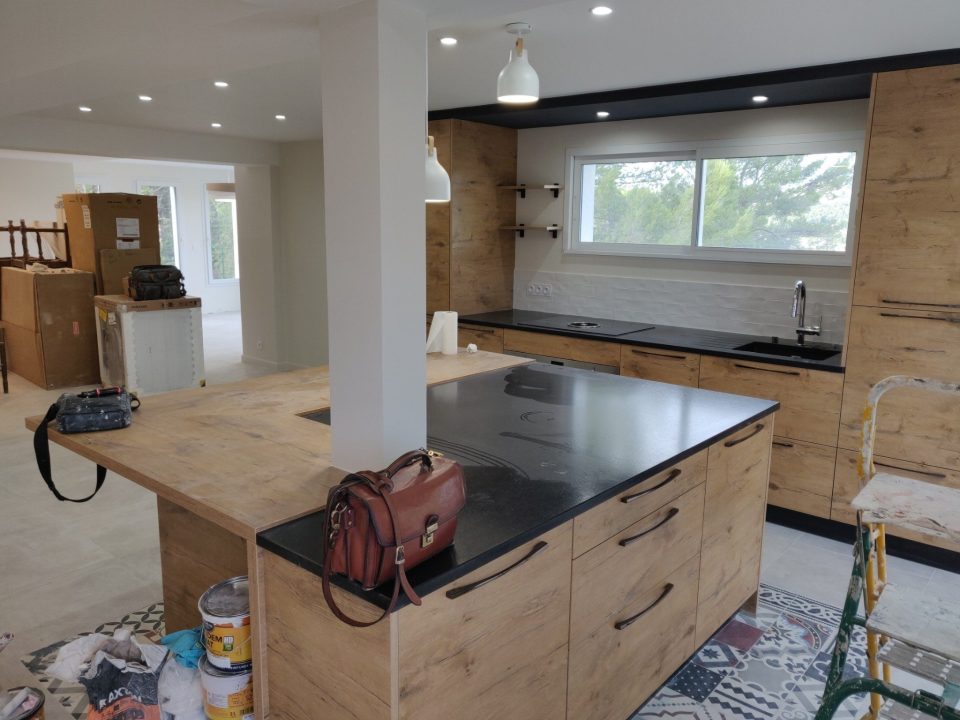
The I-shaped layout was no accident: the run of wall on the entrance side was too shallow for a conventional kitchen, so the most interesting run to exploit faced the two large openings that were kept, with the island as the central piece. Once the furniture was installed, the transformation became obvious. The cabinets are positioned all around the column and unified by the worktop, with a counter section that lets the whole breathe. The light-wood island meets a textured black worktop, a refined contrast that feels balanced and calm. The column pierces the surface as a clear design axis, expressing structure with elegance. Around it, the white splashback, low storage and natural light reinforce the room’s harmony. For more ideas, see our feature on light wood in contemporary interiors.
Step 5 – The finished space: an open kitchen with the column integrated into the island
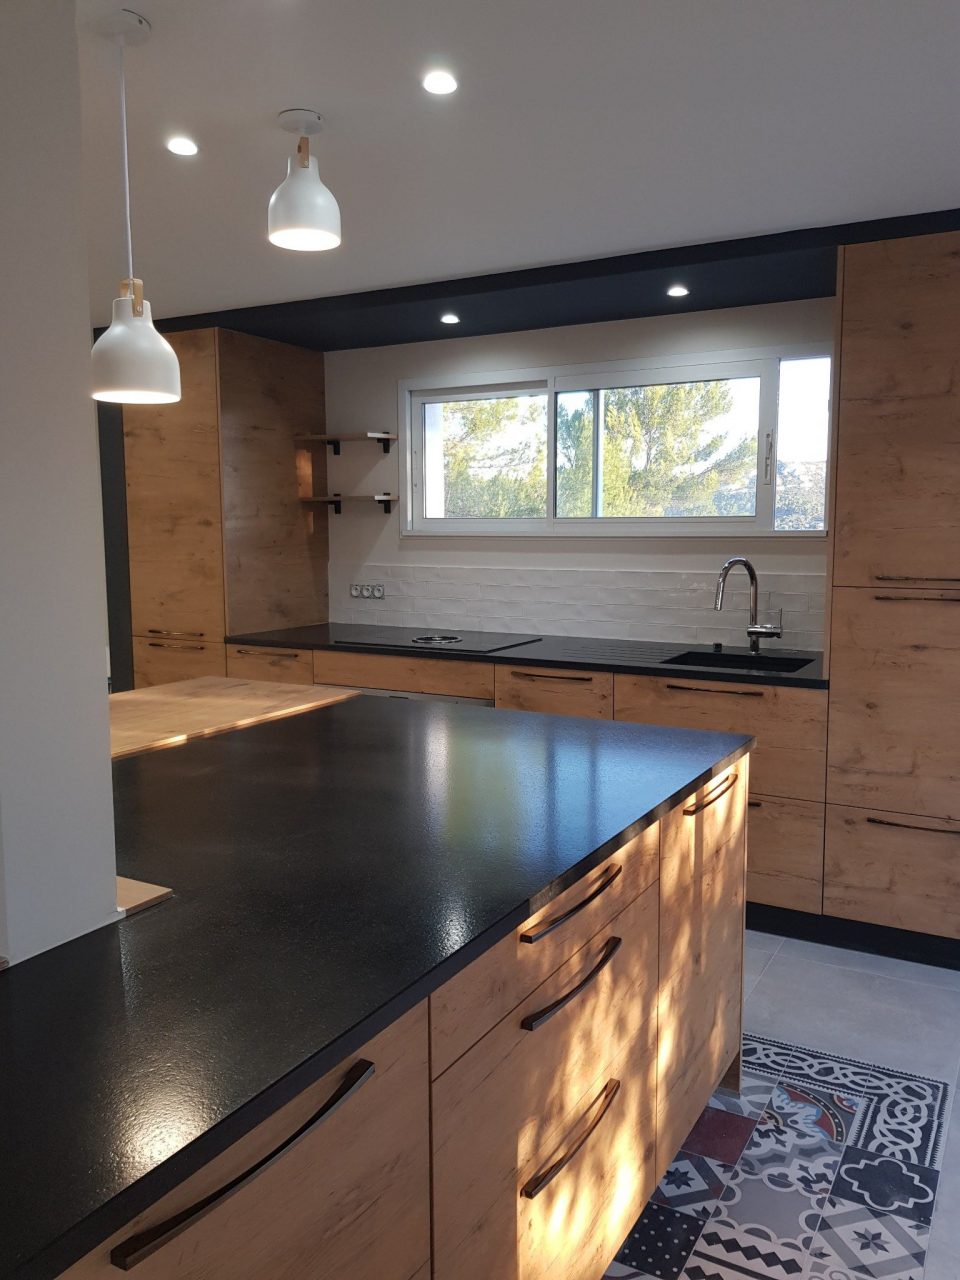
After more than three months of works and a final week of finishing touches, the final photos reveal a warm, fluid open-plan kitchen. The walls were spray-painted under meticulous protection, decorative accent colors aside. The column no longer disrupts; it anchors the island and ties floor to ceiling. Soft white pendants ease the vertical line, while daylight highlights the grain of the wood and the tactility of the black worktop. A clear demonstration that structural constraints can become a strong architectural signature when embraced by the design.
Key takeaways
- A structural column can become the organising element of the layout.
- The island is a natural solution to integrate structural constraints.
- Material contrast and clear lines build lasting visual balance.
- From structure to finishes, success relies on a coherent overall vision.
This kitchen with an integrated structural column is part of a wider renovation including a rooftop extension, two additions and a terraced pool. Our team handled the bespoke design and end-to-end site supervision, coordinating structure, joinery, kitchen fitting and plumbing, with the structural studies finalized with the concrete engineer before the build phase. From the earliest sketches, the column was planned as a functional and aesthetic axis fully expressed in the final design. More chapters of this comprehensive project will be published on the blog soon.
Find all our renovation projects, documented on real job sites, on the ArchiWorking channel.
Watch the full project, the design decisions and the before-and-after on the ArchiWorking channel.
Mathieu REY


Frequently asked questions about integrating a structural column in the kitchen
How do you integrate a structural column in an open-plan kitchen?
The most effective strategy is to incorporate it into a custom central island. You can box it in to match the cabinetry or highlight it by contrast, the goal is to make it part of the composition, not an interruption. That decision must be made at the sketch stage, not once the structural work is finished.
How much does it cost to open a load-bearing wall for an open kitchen?
On average between €5,000 and €8,000 (roughly $5,500 to $8,700) depending on the configuration, excluding other works. The price truly depends on the type of load transfer, the reinforcement and the underpinning required, and can be lower as well as significantly higher: having a specialist price your exact case is essential. This intervention is also inseparable from the other structural items, floor, linings, ceiling and kitchen refit, which must all be priced together in a global budget from the design stage.
Can a column become a decorative feature?
Absolutely. Planned from the design stage, a column can act as a strong visual marker or even the pivot of the layout, a detail that moves from problem to design statement.
Do you always have to hide a column?
No. Hiding it can weigh down the space. Often it’s more elegant to integrate it within the island or wrap it with quality materials that resonate with the overall palette.
What materials work best to clad a column?
Depending on the style: lacquered MDF, wood veneer, laminate, or metal. Prioritise a stable build-up and durable finish, consistent with the kitchen’s design language.
How long does this type of open-kitchen renovation take?
On this real project, the works took a little over three months, plus a final week of finishing touches: removal of protections, installation of the last elements and a full deep clean before handover. The duration varies with the scope, structural openings, floor works and the lead times of the kitchen cabinetry, which is why the whole schedule must be coordinated from the design stage.
Why choose a made-to-measure project when a column is involved?
Because tailored design anticipates constraints and turns them into assets. The column is then precisely integrated with furniture, lighting and circulation, delivering a fluid, functional result.