
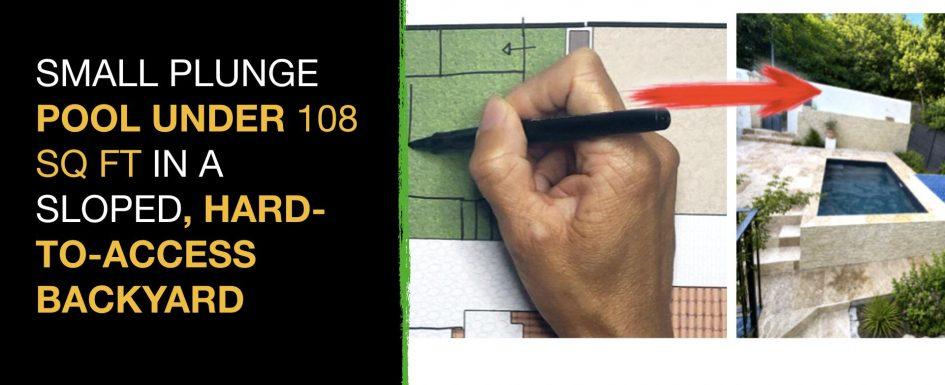
A 240 x 220 cm plunge pool (7’10” x 7’3″, under 10 m² / 108 sq ft), built into a narrow, terraced backyard that machinery could not even reach: this is the real project we walk through here, from the first layout drawing to the finished before-and-after. The site combined every constraint at once: a no-build zone, a large glass door on the lower level, a utility access point to preserve and an extremely difficult site access. If you are still at the thinking stage, the best time to shape this kind of project is the off-season, as we explain in our guide on why you should plan your garden landscape in winter.
By Clara AJMAR, Landscape Architect & Interior Design Specialist (updated July 2026)
Under 10 m² of water, three levels to connect: a constrained backyard turned into a real living space.
1. How to assess a sloped, multi-level backyard before building a plunge pool
2. Where to place a small plunge pool in a narrow backyard: buildable area, utilities and a landscape architect’s method
3. How to design steps, landings and circulation around a pool on a terraced slope
4. Why choose a masonry plunge pool on a sloped, hard-to-access site
5. Which drought-tolerant plants to grow around a plunge pool
6. How the build of a small masonry pool unfolds: excavation, foundations and finishes of a real project
7. Frequently asked questions about building a small pool on a constrained site
Clara and Mathieu walk through the layout, the constraints, the chosen solutions and the full build of this plunge pool in this video.
How to assess a sloped, multi-level backyard before building a plunge pool
The starting point is a narrow outdoor space right next to the house, served by a double staircase. The yard is organized on two main levels. The upper level, our level zero, groups a large landing, a small entrance leading to a terrace and a raised planter. The lower level sits roughly one meter (about 3 ft) below, reached through a series of intermediate landings. Reconciling these levels is the first task: every height dictates how people will move and where the pool can physically go.
The site assessment then maps the fixed constraints. Part of the yard is a no-build zone for a pool, which forces the layout to shift sideways. A large glass door on the lower level, right after the staircase, rules out repositioning elements freely. A utility access point has to remain reachable, since service lines run through that exact spot. Finally, water and electricity arrive from the house, which naturally orients both the pool location and the equipment room. The existing raised planter, well built and valuable in the composition, is kept. The rest of the staircase, the intermediate low wall, its extension and the curved shapes are fully demolished to rebuild the space on a clean, coherent base.
Where to place a small plunge pool in a narrow backyard: buildable area, utilities and a landscape architect’s method
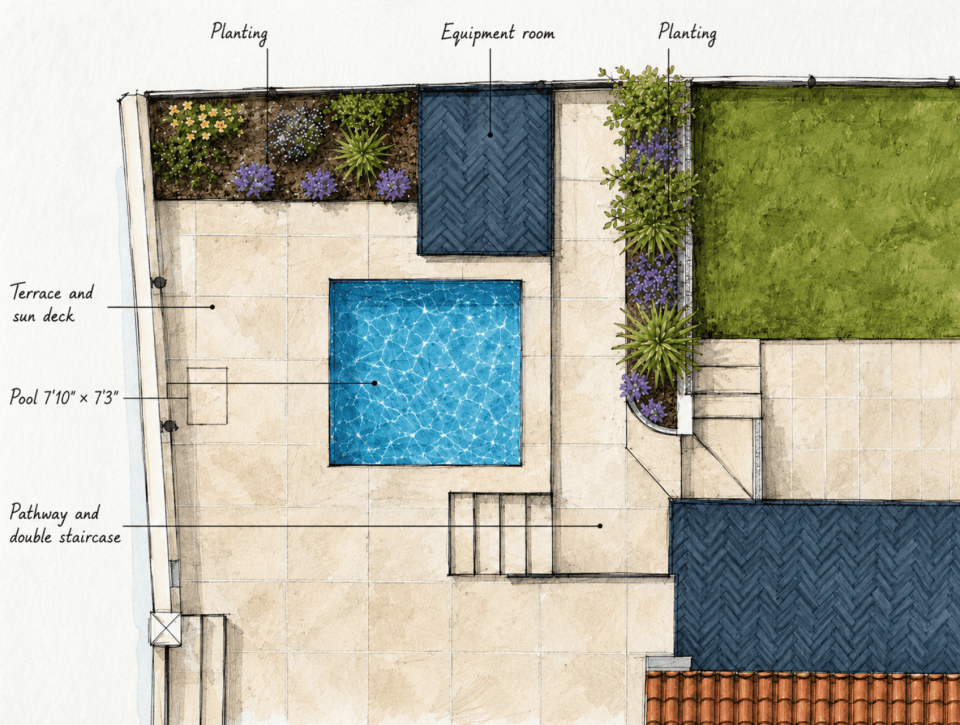
The method starts by splitting the upper level to give it a genuine everyday use, then structuring the circulation, and only then measuring what is actually left to place the pool. The chosen position accounts for the distances to the property line, the lot survey, the equipment room and the planter that stays. Three spaces then take shape: the pool, the circulation and the equipment room.
The pool takes an almost square footprint of 240 x 220 cm (7’10” x 7’3″), placed fairly centrally on the upper level. A comfortable passage of about 80 cm (31 in) is preserved along the steps and the path to the equipment room. That room is built in continuity with the rest of the project to keep a consistent look, and stays close to the pool to make daily use easier and limit hydraulic losses in the pipe runs.
Keep the equipment room within 6 meters (about 20 ft) of the pool. Beyond that distance, head losses in the pipes degrade the filtration performance and increase the pump’s energy consumption. On a constrained lot, this rule is checked at the drawing stage, together with where water and power arrive from the house: it often fixes the pool location before any aesthetic consideration.
How to design steps, landings and circulation around a pool on a terraced slope
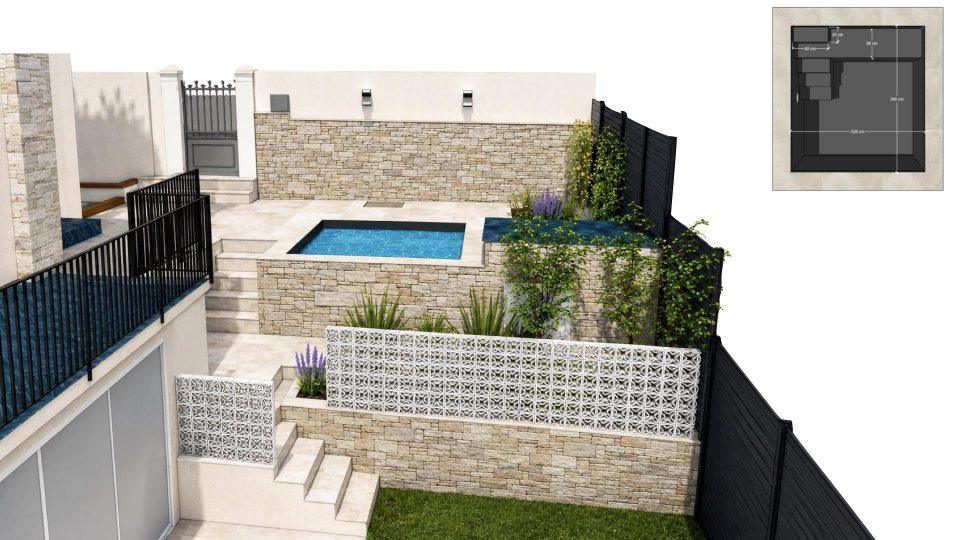
On a terraced slope, the staircase work is essential. The path is entirely redrawn and the riser heights are reworked to obtain a comfortable tread depth. This is no detail: the family will use this access every single day, in wet swimsuits in summer and with full hands the rest of the year. The old steps, slightly crooked, are realigned to create a cleaner landing, into which the utility access point is integrated and tiled so it stays reachable without breaking the composition.
Playing with the landings creates a fluid circulation between all the spaces: the terrace, the pool, the equipment room and the lower level. Despite the level constraints, the balance between the landings, the curves that were kept and the new straight angles makes the access to the lower part comfortable. This stitching between the existing and the new is what turns a mere passageway garden into a real living space.
Why choose a masonry plunge pool on a sloped, hard-to-access site
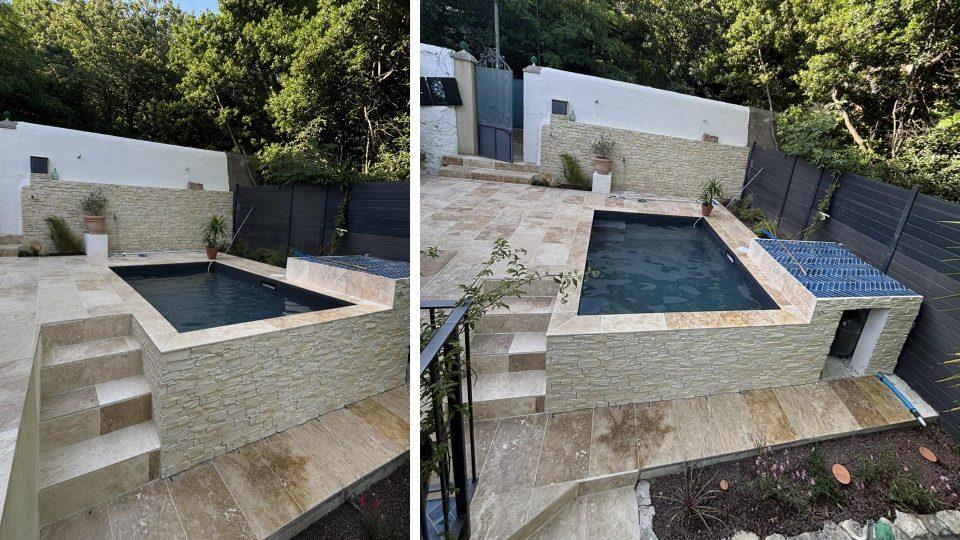
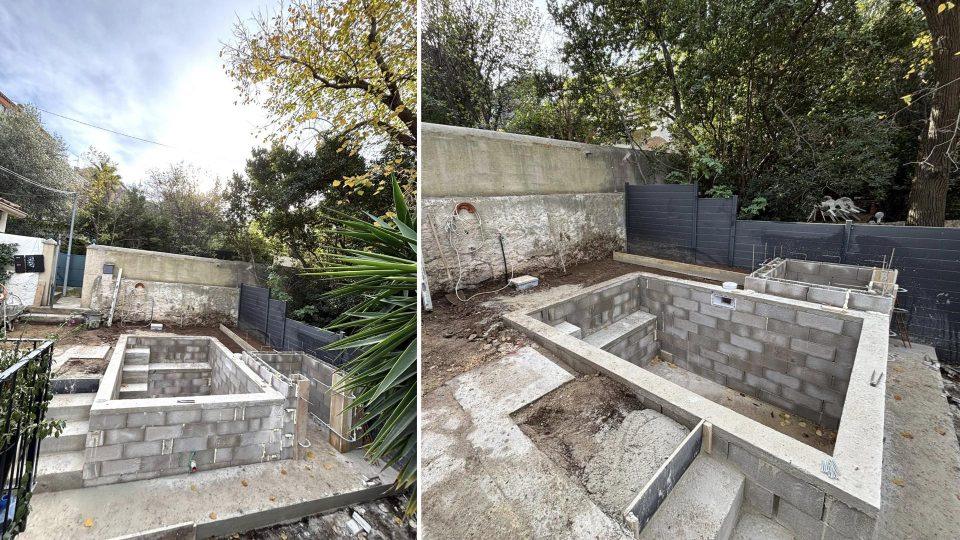
The extremely difficult access dictated the construction method: the whole project was built by hand, with no way to bring in heavy machinery or a prefabricated shell. The pool is therefore fully masonry-built, a solution whose materials can be carried in piece by piece and which, as a bonus, offers total freedom of shape and dimensions, precious when fitting 240 x 220 cm to the centimeter between the circulation and the property limits.
The structure was validated by a structural engineer. It is an extra cost, but it is largely offset by the safety of the structure and by the insurance coverage it provides: in case of damage, a pool sized and approved by an engineering office stands up to scrutiny, an improvised one does not. On a sloped lot, where the pool walls resist uneven earth pressure, this validation is not a comfort option but a guarantee of durability.
On this build, the existing ground level was reused to reduce excavation, and the rock removed was used directly to shape the pool volume. This optimization limits the volume of spoil to haul out by hand and significantly reduces the labor and cost of the earthworks. On a hard-to-access site, every cubic meter that never has to leave the yard is a direct saving on the budget.
Which drought-tolerant plants to grow around a plunge pool
As the space becomes more mineral with the pool, the landings and the paving, planting plays a key role in bringing back freshness and making the whole pleasant to live in. The plant palette is made of hardy, drought- and sun-tolerant species suited to a Mediterranean-type climate. For grasses and perennials: Stipa tenuifolia (Mexican feather grass), Gaura lindheimeri and Perovskia atriplicifolia ‘Blue Spire’ (Russian sage) bring movement and long flowering.
Structure comes from Phormium tenax variegatum (New Zealand flax), Punica granatum (pomegranate), Pittosporum tobira (Japanese mock orange) and Ceanothus thyrsiflorus repens (creeping blueblossom) as groundcover. Climbers dress the walls and boundaries: Trachelospermum jasminoides (star jasmine), Jasminum nudiflorum (winter jasmine) and Rosa banksiae ‘Lutea’ (Lady Banks’ rose), thornless and ideal along a walkway. A volcanic-rock mulch completes the beds: it limits evaporation, resists wind and stays consistent with the mineral spirit of the project. Most of these species are also easy to multiply yourself, as shown in our step-by-step guide to propagating plants by cuttings.
How the build of a small masonry pool unfolds: excavation, foundations and finishes of a real project
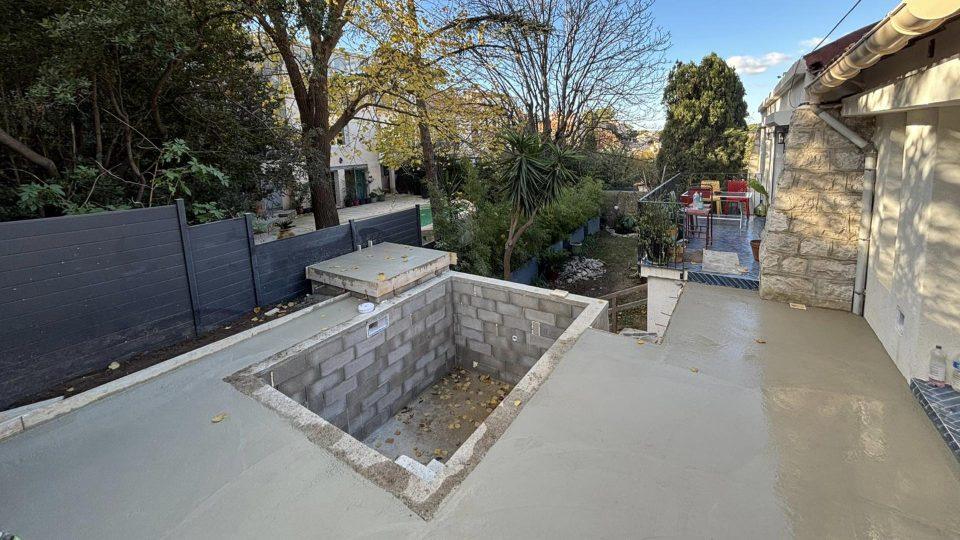
Before the works, this space was a garden that existed but had no real everyday use beyond circulation. The build starts with the demolition of the removed elements, then the excavation, done by hand given the access. The foundations are then poured and the pool is built in masonry. The steps are formed, the concrete slab is poured, and the necessary curing and drying time is respected before moving on.
The equipment room is built in continuity with the project to preserve the visual harmony of the whole. Then come the finishes: a render on the walls matching the house, travertine stone on the floor and a few touches of colored bejmat tiles. Outdoors, choosing frost-resistant materials is imperative: a frost-sensitive stone or terracotta crumbles within the first winters under freeze-thaw cycles. The result is a striking before-and-after that turns a difficult lot into a genuine plunge pool for the summer season.
Before diving into this specific case, if you are starting from scratch, our complete guide covers the 10 key points to check before starting an inground pool project, from soil study to safety systems.
Find all our outdoor and renovation projects, documented on real job sites, on the ArchiWorking channel.
Watch the full project, the layout decisions and the before-and-after on the ArchiWorking channel.
Clara AJMAR


Frequently asked questions about building a small pool on a constrained site
How much does a small masonry plunge pool cost on a hard-to-access site?
For a complete project like this one, including demolition, hand excavation, an engineer-validated masonry pool, the equipment room, rebuilt steps, travertine finishes and planting, a budget of €50,000 to €60,000 (roughly $55,000 to $65,000) is consistent. Difficult access weighs heavily on labor, but reusing the existing ground level and the removed rock to shape the pool optimizes the earthworks. Every site remains a specific case to be priced on plan.
Do you need a permit to build a plunge pool under 10 m² (108 sq ft)?
A landscape architect or any outdoor design professional will tell you that permitting is determined case by case for this type of project. Even where no permit is required, local zoning and building rules still apply: setbacks from property lines, permeable surface ratios, fencing and safety requirements, homeowners association rules where relevant. Checking the regulations of your specific zone is systematic before any project, even for a small pool.
How far from the pool should the equipment room be?
Within 6 meters, about 20 feet, of the pool. Beyond that distance, head losses in the pipes degrade the filtration efficiency and increase the pump’s electricity consumption. On a constrained lot, the equipment room position is decided at the drawing stage, based on where water and power arrive, and it can be built in continuity with the project to preserve the visual harmony, as in this real case.
Why have a masonry pool validated by a structural engineer?
Because a masonry pool on a slope resists significant and uneven earth and water pressure. Validation by a structural engineer guarantees the sizing of the walls and reinforcement, secures the structure over time and conditions the insurance coverage in case of damage. It is an extra cost to plan for, but it is largely offset by the durability of the structure and the legal protection it provides.
How can a landscape architect help design a small sloped backyard with a plunge pool?
Working on plan, before anything is built. A landscape architect maps the levels, the buildable area, the utilities and the daily circulation, then tests several layout scenarios on the drawing to find the one that fits the constraints instead of fighting them. On this project, that method is what allowed a 240 x 220 cm pool, an equipment room and comfortable steps to coexist on a narrow terraced lot, entirely built by hand. The earlier this work happens, the cheaper the arbitrations are.
Which plants should you choose around a pool in a dry climate?
Hardy, drought-tolerant plants, with no thorns or staining fruit near the water: grasses like Stipa tenuifolia, perennials like gaura and Russian sage, structural shrubs like New Zealand flax, pittosporum and pomegranate, groundcovers like creeping ceanothus, and climbers like star jasmine or Lady Banks’ rose. A volcanic-rock mulch limits evaporation and maintenance while staying consistent with the mineral finishes of the pool area.