
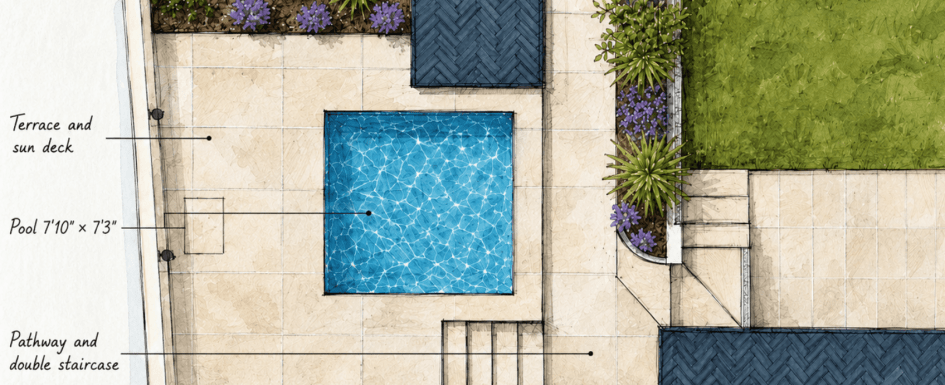
Dreaming of a pool in your backyard, but not sure what needs checking before breaking ground? A pool is not just a basin of turquoise water. It is a structuring decision, technical, administrative and landscape-related all at once. Overlooking a single parameter can blow up your budget or permanently degrade your everyday comfort. The best projects are shaped well before the season starts, as we explain in our guide on why you should plan your garden landscape in winter.
By Clara AJMAR, Landscape Architect & Interior Design Specialist (updated July 2026)
A successful pool is never an isolated element. It is one piece of a whole, designed from day one.
1. Understanding the soil: clay, fill, slopes and geotechnical study
2. Choosing the right placement: sun, wind and connection to the house
3. Defining the ideal dimensions: real use, taxes and the 10 m² threshold
4. Checking the administrative rules: zoning, permits and review times
5. Choosing the structure type: poured concrete, fiberglass shell or reinforced membrane
6. Planning the equipment room: distance, ventilation and future upgrades
7. Managing filtration and water treatment: salt, chlorine and automatic regulation
8. Meeting the safety requirements: local codes and protection systems
9. Designing the surroundings: decks, planting and lighting
10. Managing and supervising the build: coordinating the trades
Real budget and timeline of a pool project
Frequently asked questions
Over the years, I have supported more than fifty outdoor architecture projects integrating pools, masonry terraces and complete landscaped spaces. What these projects taught me is simple: a successful pool is never an isolated element, it is one piece of a whole. It must dialogue with the house, the terrain, the daily uses and the sun exposure to create real visual and functional harmony.
Clara comments on the key points of a pool project in this video.
Here are the 10 strategic points to validate before digging the first cubic meter of earth.
1. Understanding the soil: clay, fill, slopes and geotechnical study
The soil is the invisible foundation of any pool. Without a proper diagnosis, the risks are multiple: shell cracking, hydrostatic pressure when the water table rises, irreversible structural settlement. On sensitive ground, clay, fill or slopes, a geotechnical soil study is essential. A preliminary analysis can save tens of thousands in repair work by adapting the foundations from the start rather than suffering defects afterwards.
On the projects we support, a full geotechnical study runs between €2,500 and €4,500 (roughly $2,700 to $4,900). We advise requesting one or two quotes, and above all defining the scope of the study with the masonry contractor, the landscape architect or the engineering office depending on the project: the borings must be established in coherence with the actual project and its technical needs, not generically. A well-framed study directly serves the sizing of the foundations.
2. Choosing the right placement: sun, wind and connection to the house
Placement determines 70% of the success of your outdoor space. Sun orientation for natural heating, protection from prevailing winds and the visual relationship with the living areas are primary criteria. A well-placed pool gets used three times more than a basin relegated to the back of the yard without any thought for daily use, and it durably increases the value of your property.
3. Defining the ideal dimensions: real use, taxes and the 10 m² threshold
Dimensions are a regulatory, tax and functional issue all at once. In many jurisdictions, very small pools benefit from lighter procedures and a limited tax impact; in France for instance, the threshold sits at 10 m² (108 sq ft). Beyond that, formal declarations apply strictly. Think first about the real use, lap swimming, relaxing or family play, before targeting raw size. A smaller pool surrounded by generous decks will often be more pleasant day to day than a large empty rectangle. To see what a well-designed small format allows on a complex lot, read our real case of a plunge pool under 10 m² built in a sloped, hard-to-access backyard.
4. Checking the administrative rules: zoning, permits and review times
Every municipality imposes its own constraints through zoning and building regulations: setbacks from property lines, allowed lot coverage, fencing requirements, sometimes even finish colors in protected districts. Homeowners association rules can add another layer. A bad choice in a protected or regulated area can block the job site for months. Early administrative validation is the only way to secure the investment before committing to an excavation contractor.
On timelines, permit review times vary widely by municipality and by county. Whatever the local framework, plan one extra month as a safety margin: in our experience, a request for additional documents frequently arrives and can impact the schedule, because the review clock restarts upon receipt of the modified document or the answer to the question raised.
5. Choosing the structure type: poured concrete, fiberglass shell or reinforced membrane
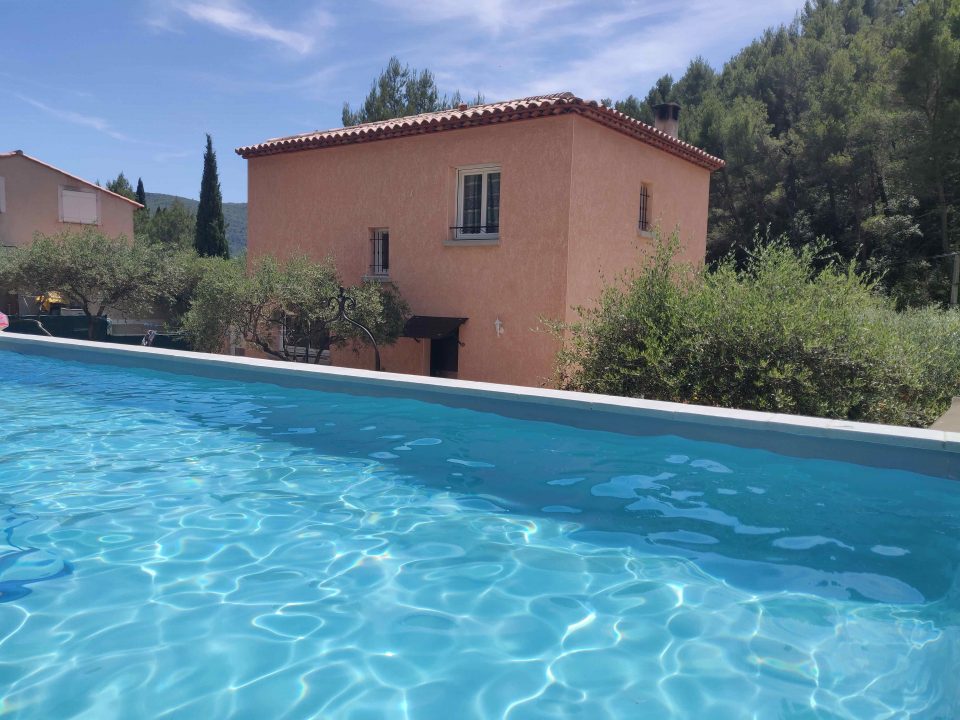
Poured concrete for maximum durability, a fiberglass shell for installation speed, or a reinforced membrane for flawless waterproofing on complex shapes. Each solution has specific technical characteristics that must match the topography of the lot. This structural choice will influence the maintenance cost over the next twenty years.
6. Planning the equipment room: distance, ventilation and future upgrades
This is the operational heart of the hydraulic system. Too often cramped, damp or poorly ventilated, a badly designed equipment room quickly becomes a source of breakdowns and noise nuisance. The base rule is to keep it within 6 meters, about 20 feet, of the pool: beyond that, head losses degrade the filtration performance and increase the pump’s consumption. Plan an accessible, dry space large enough to accommodate future upgrades: heat pump, salt chlorine generator.
7. Managing filtration and water treatment: salt, chlorine and automatic regulation
Between salt, chlorine, UV or ozone, there is no universal solution, only a system adapted to your climate and the time you have available. Undersized filtration or too short a cycle time are the first causes of cloudy water and dissatisfaction. Investing in an automatic pH regulator remains the best way to guarantee crystal-clear water without excessive chemical handling. As an order of magnitude on our projects: €600 to €1,800 for an installed pH regulator, €1,500 to €3,750 for a complete salt chlorine generator, and in yearly running costs €150 to €450 for chlorine treatment versus €70 to €270 for salt.
8. Meeting the safety requirements: local codes and protection systems
Drowning prevention is a legal obligation in many jurisdictions and, in the United States, most local codes and insurance policies require compliant protection: fencing with self-closing gates, alarms, safety covers or enclosures. This is not an option but a civil and moral responsibility. As an order of magnitude: €200 to €600 for a certified alarm, €1,500 to €5,000 for a protection fence, €6,000 to €10,000 for an automatic safety cover and €8,000 to €25,000 for a pool enclosure. Integrating these systems from the design stage makes them aesthetically coherent with the project, and can even turn them into assets for retaining the water’s heat.
9. Designing the surroundings: decks, planting and lighting
It is the pool decks, the choice of plant species and the night lighting that turn a simple basin into a true outdoor living room. A common deck width sits between 1 and 1.5 m (3 to 5 ft), and can go up to 2 m (6.5 ft) on projects that allow it: in our experience, on a real project where the client wanted a hybrid additional sunbathing space, that extra width proved highly appreciated for lying down. On the lounge side, aim for 3 m (10 ft) to comfortably fit the furniture. A global approach avoids the patchwork effect and guarantees visual continuity between terraces and pool. Non-slip, aesthetic materials, natural stone or porcelain stoneware, are the key to a project that outlasts trends. For the planting, choosing hardy species you can multiply yourself also helps the budget, as shown in our step-by-step guide to propagating plants by cuttings.
10. Managing and supervising the build: coordinating the trades
A pool project mobilizes many trades: excavation, masonry, hydraulics, electricity and landscaping. Without rigorous management or the trained eye of a project supervisor, the job site can quickly become a succession of disappointing technical compromises. Professional supervision guarantees the respect of the initial budget, the coordination of the contractors and the final compliance of the structure with best practices.
Anticipate to enjoy: real budget and timeline of a pool project
Those who succeed with their pool project have one thing in common: they anticipate every technical and administrative detail before digging. On the projects we support, a well-built, coherent pool project sits between €20,000 and €60,000 (roughly $22,000 to $65,000) depending on the structure type, the materials, the earthworks and the level of finish. Below that, significant trade-offs are needed. Above it, high-end configurations or complex lots can justify higher budgets. One important note on all the prices quoted in this article: every contractor is free to set their own rates, so these amounts are given as general evaluation benchmarks to frame your thinking.
On timelines, all project types combined, count on average between 2 and 5 months from the first dig to filling the pool. This includes study time, administrative validations, earthworks, construction of the basin, equipment and finishes. The shortest projects are generally fiberglass shells on simple lots. Poured concrete projects with complete surrounding landscaping sit at the top of that range.
A successful pool is one that makes itself technically invisible, leaving only the pleasure of swimming. That result is not improvised: it is prepared upstream, with the right professionals, the right diagnoses and a global vision of the project from the first sketch.
Find all our pool and outdoor design advice, documented on real job sites, on the ArchiWorking channel.
Clara AJMAR


Frequently asked questions about pool projects
What is the average budget for a complete pool project?
A well-built, coherent pool project sits between €20,000 and €60,000 (roughly $22,000 to $65,000) depending on the structure type, the materials, the complexity of the earthworks and the level of finish. Below that range, significant trade-offs on quality or finishes are needed. Configurations with complete surrounding landscaping, a heat pump and an integrated safety system sit at the top of the range. Since every contractor sets their own rates, these amounts are general evaluation benchmarks.
How long does it take to build a pool from start to finish?
On average, between 2 and 5 months all project types combined, from the first dig to filling the pool. Fiberglass shell projects on simple lots are the fastest. Poured concrete builds with complete surrounding landscaping sit at the top of that range. Permit review times can extend this duration if the municipality has long processing times or requests additional documents, which restarts the review clock.
Do you need a permit to build a pool?
It depends on your jurisdiction and the size of the pool. In most municipalities, an inground pool requires a building permit covering structure, fencing and electrical work, and homeowners association approval may apply on top. Very small pools benefit from lighter procedures in some countries: in France for example, no formality is generally required under 10 m² (108 sq ft). Checking your local zoning and building regulations is essential before any decision.
Fiberglass shell or poured concrete: which structure should you choose?
The fiberglass shell is faster to install, with shorter job-site times and often a lower installation cost. It suits simple lots and standard shapes well. Poured concrete offers maximum durability, total freedom of shape and better resistance on difficult ground (clay, slope, water table). It requires a longer build and a higher budget, but represents a more durable asset investment over twenty years and more.
How can a professional help you design a pool project?
By working on plan, before anything is built. A landscape architect or pool designer maps the soil constraints, the buildable area, the utilities, the safety requirements and the daily circulation, then tests several placement scenarios on the drawing to find the one that fits the constraints instead of fighting them. The earlier this work happens, the cheaper the arbitrations are: moving a pool on a plan costs nothing, moving it on a job site costs thousands.
What is the most common mistake in a pool project?
On the projects we support, the most common mistake is treating the equipment room, the safety systems and the surrounding landscaping as secondary items to decide after the basin is built. These are elements to integrate from the design stage: an undersized equipment room cannot easily be corrected once the decks are laid, and a safety system added afterwards will always be less well integrated visually than a cover or a fence designed with the project.